






Blog
Insulating your loft with mineral wool – a step-by-step guide to doing it yourself

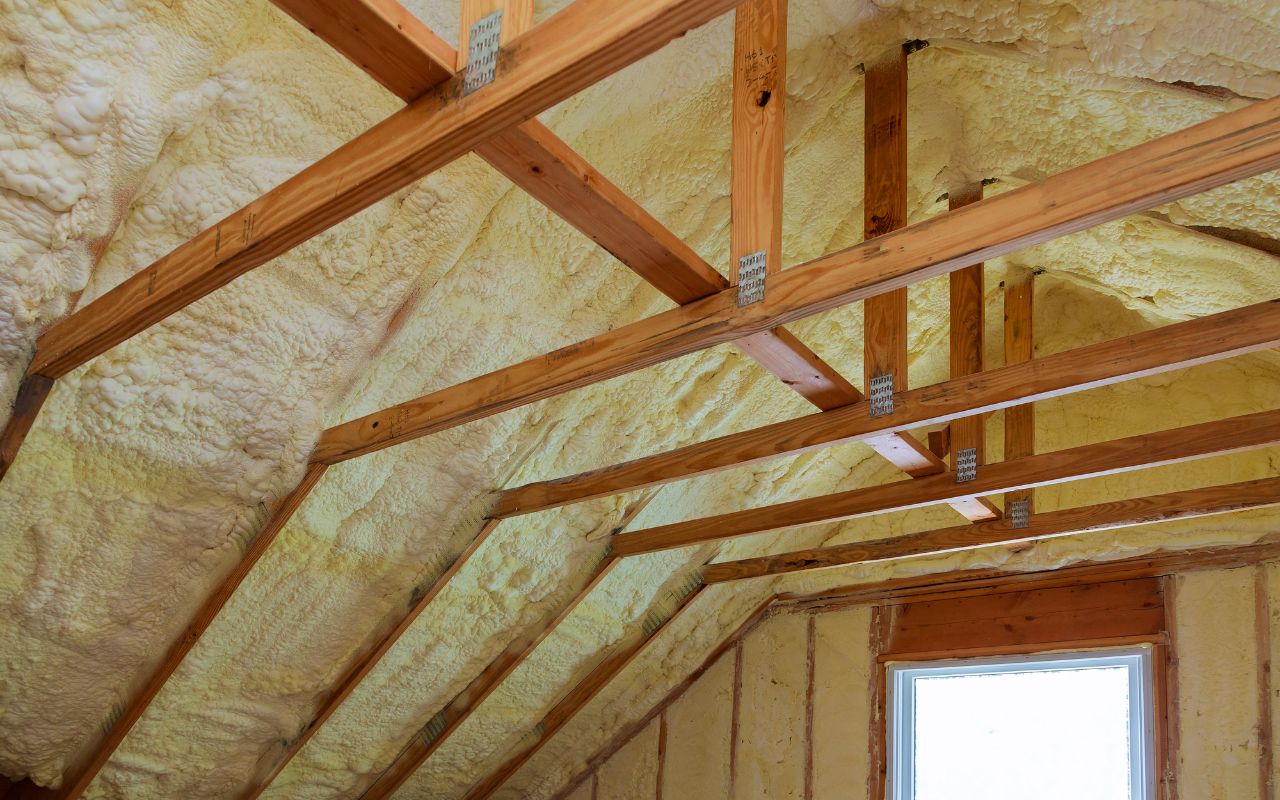
Insulating your loft is an investment that can significantly reduce your heating bills – by as much as 30%. You can do it yourself, in a single weekend, without a team and without specialist qualifications. Discover the complete list of materials, a step-by-step installation guide and current prices for 2026!
Key findings
- Up to 25–30% of heat can escape from a building through an uninsulated roof, which is why insulating the loft is one of the most cost-effective energy-efficiency investments.
- Glass mineral wool is the best choice for sloping attics, as it is lightweight, resilient and easy to install between the rafters.
- To meet the current WT 2021 requirements, it is advisable to use at least 25 cm of insulation, preferably in two layers.
- Airtight installation, the elimination of thermal bridges and a correctly installed vapour barrier are crucial to the effectiveness of thermal insulation.
- Well-installed loft insulation can reduce heating costs by as much as several hundred to over a thousand zlotys a year.
Table of contents
Why it’s worth insulating your loft with mineral wool – savings and comfort
How much can you save on heating after insulating your loft?
Up to 25–30% of heat escapes from the entire building through an uninsulated roof. This is not just a rough estimate — it has been confirmed by thermal imaging surveys carried out on thousands of homes in Poland. Let’s put this into concrete figures.
Let’s take a 120 m² house with annual heating bills of around 6,000 zł. Once the loft has been properly insulated, you can expect to save between 1,200 and 1,800 zł a year. The investment usually pays for itself in 3–5 years, depending on the thickness of the insulation and the type of heating system you have in your home.
However, it is not just a question of the bills. In summer, an uninsulated loft can heat up to a temperature at which it is difficult to function normally. Mineral wool works both ways – in winter it keeps the heat in, and in summer it keeps it out. You insulate once and benefit all year round.
Mineral wool vs other insulation materials – a brief comparison
In a sloping loft, there are several materials to choose from, but not all of them work equally well:
| Material | Price | Lambda λ | Fire resistance | Vapour permeability | Self-assembly |
| Mineral wool | average | 0.032–0.040 | A1/A2 (non-flammable) | very good | easy – it’s a push-fit |
| Styrofoam | low | 0.031–0.040 | flammable, without additives | weak | difficult – cutting to size |
| Cellulose | average | 0.038–0.042 | requires waterproofing | goods | requires blowing |
| PUR foam | high | 0.022–0.028 | depending on the formula | very poor | requires a team with a spray system |
Mineral wool is the best choice where the safety and integrity of the roof structure are paramount. A fire reaction class of A1 or A2 means that the material is virtually non-combustible – a significant difference compared to polystyrene. Furthermore, mineral wool „breathes”, meaning it allows water vapour to pass through, ensuring that moisture does not become trapped within the roof structure. In a sloping loft, where you’re installing the material yourself between the rafters, it is mineral wool that leaves the least room for error.
If you’re unsure whether to choose rock wool or glass wool, read our separate guide: Rock wool or glass wool – which to choose?.
What you’ll need – a list of materials and tools for insulating your home yourself
Which type of mineral wool to choose for the loft – thickness and lambda value
The current Technical Specifications (WT 2021) require a heat transfer coefficient of U ≤ 0.15 W/(m²·K) for pitched roofs. In practice, with mineral wool with a thermal conductivity of λ = 0.035, this means a total of at least 23–25 cm of insulation – usually arranged as 15 cm between the rafters and 10–15 cm beneath the rafters.
The lower the lambda value, the better the insulation performance for the same thickness. Knauf Unifit 035 wool has a λ value of 0.035 W/(m·K) – a very good result for glass wool. If you’re looking for even better performance at the same thickness, go for Unifit 032 (λ = 0.032).
If you’re building a low-energy house or simply want to be on the safe side, aim for a total of 30 cm – this is a level that gives you a realistic margin above the required standard, rather than just meeting the minimum requirement.
For insulation between the rafters, this works a treat Knauf Unifit mineral wool for attics – 100 mm or 120 mm rollers can easily be adapted to standard rafter spacing (60 or 90 cm). ≤ 0.15 W/(m²·K) in new buildings. How does this translate into the thickness of the insulation?
| Insulation thickness | Knauf product | λ [W/(m·K)] | U [W/(m²·K)] | WT 2021 standard? |
| 15 cm | Unifit 035 | 0,035 | ~0,23 | ❌ Does not comply (new buildings) |
| 20 cm | Unifit 035 | 0,035 | ~0,175 | ⚠️ Granicznie (renovations) |
| 25 cm (15+10) | Unifit 032 + Unifit 032 | 0,032 | ~0,128 | ✅ More than meets the eye |
| 30 cm (20+10) | Unifit 035 + Unifit 035 | 0,035 | ~0,117 | ✅ More than meets the eye |
*Approximate values, calculated using a simplified method that does not take thermal bridges into account. Precise thermal calculations should be carried out by the designer or site manager.
Vapour barrier and wind barrier membranes – are they compulsory?
Yes, both are essential when insulating a habitable loft – and this is not just a formality, but a prerequisite for the durability of the entire insulation.
The wind barrier (roof membrane) is installed from the outside, over the insulation. It protects the insulation from wind and external moisture, but is itself vapour-permeable – Sd value ≤ 0.1 m.
The vapour barrier is installed from the inside, on the side facing the heated room. Its purpose is to block water vapour from inside the house before it penetrates the insulation – here you need an Sd value of ≥ 2 m (e.g. Knauf Vapour Barrier 0.2 mm).
Shopping list for a 100 m² loft (roof area):
- Mineral wool (e.g. Knauf Unifit 035, 100 mm) – first layer, approx. 100–120 m² with a margin of 10–20%
- Mineral wool (e.g. Knauf Unifit 035, 100 mm) – second layer beneath the rafters, approx. 100–120 m²
- Vapour barrier film – approx. 120 m² (including overlaps)
- Wind barrier membrane – if not installed during the roofing work – approx. 120 m²
- Vapour barrier tape for sealing joints – 2–3 rolls
- Wooden battens and counter-battens – for fixing the membrane and the second layer
- Construction stapler + staples
- A wool knife or scissors, a tape measure, a spirit level
Tools for installing insulation between rafters
- A knife with a long blade or a special wool knife
- Upholstery/construction stapler for securing film
- Adhesive tape for vapour barrier film – ensuring the joints are airtight is the most important aspect of the entire installation
- A measuring jug and a pencil
- A ladder or indoor scaffolding
- Gloves, goggles and an FFP2 mask – compulsory when cutting wool
- Drill and screwdriver for battens
- Spirit level
Do you have any questions about choosing the right mineral wool for your loft? Drop us a line – we’ll advise you without trying to push any unnecessary products on you. The full range of Knauf mineral wool is waiting for you in-store.
Insulating your loft step by step – a DIY guide
Step 1 – Preparing the loft and measuring the area
Before you start, check the condition of the rafters – look out for damp, signs of mould and damage caused by insects. If anything concerns you, call in a carpenter before you insulate the roof, not afterwards.
Measure the rafter spacing – typically 60 or 90 cm. This determines the width of the rolls you’ll need to order. Knauf Unifit 035 wool is available in widths of 60 and 120 cm – the latter can easily be cut in half.
Calculate the area of the roof slopes, not the floor area of the loft – the pitch increases the actual area by 15–25%. Don’t guess the area by eye: use the insulation calculator available on each product page.
Step 2 – Fitting the wind barrier membrane from the outside
If the roof has been recently re-roofed and the wind barrier has already been fitted by the roofer – skip this step. If not, you will need access from the outside or via the roof surface.
Lay the membrane in horizontal strips, from the eaves towards the ridge. Each subsequent strip should overlap the previous one by at least 10 cm. Join the strips using tape specifically designed for membranes – ordinary grey tape will not remain watertight over the years. The membrane must be taut, but without any folds.
Step 3 – Laying the wool between the rafters (first layer)
This is the most important step in the whole installation process. You insert the insulation into the space between the rafters from inside the loft.
Cut the roll 1–2 cm wider than the actual rafter spacing – the wool should fit snugly and stay in place without glue or nails. Do not compress it – compressed wool loses its insulating properties and does not regain its original elasticity. Leave a ventilation gap of at least 2–3 cm between the insulation and the membrane – without it, moisture has nowhere to escape, and this is a sure-fire recipe for roof problems.
The recommended product at this stage is Knauf Unifit 035, with a thickness of 100 or 120 mm. You can find the full range of products in the category: mineral wool for loft insulation.
Step 4 – A second layer of insulation beneath the rafters
A wooden rafter conducts heat about 10 times more effectively than wool – without a second layer, you lose between a few and over a dozen per cent of the entire roof’s insulation value through these thermal bridges. A second layer eliminates this problem.
Lay the wool perpendicular to the first layer, on a grid of battens screwed to the rafters every 40–60 cm. This layer should be at least 80–100 mm thick, ideally 120–150 mm. Adjust the spacing between the battens to match the width of the insulation you are using – usually 60 cm.
You don’t have to do everything in one day – you can easily fit the second layer the following day.
Step 5 – Vapour barrier film on the inside and finishing touches
A vapour barrier is the final layer before the ceiling is finished; it is installed on the inside of the loft, over the insulation that has already been laid.
Lay the foil strips horizontally with an overlap of at least 15 cm – and seal each overlap with a dedicated vapour barrier tape. Failing to do this is the most common mistake we see in DIY installations. The foil must also be sealed tightly around all penetrations: pipes, cables and beams.
Once the foil has been fitted, you can move on to finishing the ceiling – plasterboard on a grid, planks or panelling, depending on your preference. Leave an installation gap of 3–5 cm between the foil and the board so that you can run cables without piercing the vapour barrier.
The cost of insulating an attic with mineral wool – how much does it all cost?
The price of mineral wool per m² in 2026
Approximate prices (please check the current price list before purchasing, as prices may vary depending on the quantity):
- Knauf Unifit 035, thickness 100 mm: approx. 24 zł/m²
- Knauf Unifit 035, thickness 120 mm: approx. 29 zł/m²
- Knauf Unifit 032 (better lambda value), thickness 100 mm: approx. 35 PLN/m²
For larger orders, it’s worth asking about a discount – our prices are negotiable for larger quantities. If you’d like to find out more about what affects the price of wool, take a look at this separate article: How much does mineral wool cost?.
The most common mistakes made when insulating an attic yourself
Incorrect wool thickness – how to avoid overpaying and ensuring your insulation is adequate
The first mistake is installing just a single 10 cm layer, because „that’s all that fits between the rafters”. The result: The roof’s thermal transmittance is ~0.35 W/(m²·K) instead of the required 0.15 – the roof does not comply with the WT 2021 standard, and you’ll be paying higher bills for years to come.
The second mistake is to buy more expensive wool with λ = 0.032 instead of the cheaper 0.035 variety, whilst at the same time compromising on the required thickness. This is only an apparent saving.
Always calculate the required thermal resistance: R = thickness [m] / lambda. For a roof with a U-value requirement of 0.15, you need R ≥ 6.67 m²·K/W – with wool having a lambda value of 0.035, this means a minimum total thickness of 23.3 cm.
Breaches in insulation – thermal bridges and how to avoid them
Only the second layer beneath the rafters – as described in step 4 – eliminates gaps between the rafters. Remember also the knee wall: the insulation must reach the ceiling without any gaps. Around the roof window, seal the entire window flashing with insulation – do not leave any gaps.
A leaky vapour barrier is a problem in its own right – every unsealed joint acts as a moisture bridge, and this is a direct route to mould and the degradation of the insulation within a few years.
Have a look at our detailed guide: the most common mistakes made when laying wool – you’ll find five cases there that really cost a lot.
FAQ – frequently asked questions about fitting insulation yourself
Is it difficult to insulate an attic yourself?
The job does not require a building licence or specialist equipment. It is physical work, but not technically complex – mainly precise cutting and laying the insulation. A typical DIY enthusiast can manage on their own or with one person to help. The hardest part is working on steep slopes and in hot weather – plan to do this work in the early hours.
What thickness of mineral wool should be used for an attic in 2026?
The current Technical Specifications (WT 2021) require U ≤ 0.15 W/(m²·K) for pitched roofs. With rock wool (λ = 0.035), this equates to a minimum total thickness of 23–25 cm. In practice, we recommend 30 cm: 15 cm between the rafters and 15 cm beneath the rafters.
Does mineral wool require a vapour barrier?
Yes – in the case of a converted loft, a vapour barrier on the inside is essential. Without it, water vapour from the room penetrates the insulation, condenses and, over time, damages both the insulation and the rafters. The membrane must be airtight – all joints must be sealed with tape.
When is the best time to insulate the loft – summer or winter?
Ideally, spring or autumn – avoid extreme temperatures. In summer, the loft can heat up to 50–60°C, which makes work difficult and shortens the lifespan of the film during installation. In winter, there is an increased risk of condensation whilst working. If you have to insulate in summer, start in the morning and finish before midday.
How long does it take to insulate a 100 m² loft yourself?
When working as a team of two – realistically 2–3 working days: one day for preparation and the first coat, one day for the second coat and the vapour barrier, and half a day for sealing and tidying up. For large roof areas or complex roof shapes, allow 4–5 days.


Given the specified 25–30 cm of insulation, I would also add that, after installation, you should thoroughly check the vapour barrier for leaks at the eaves, roof windows and service penetrations. In practice, when selecting a heat pump or a photovoltaic system, a poorly insulated loft can overstate the energy requirement by more than the difference between lambda values of 0.035 and 0.032.