






Blog
How is a plasterboard suspended ceiling installed, and how long does it take?

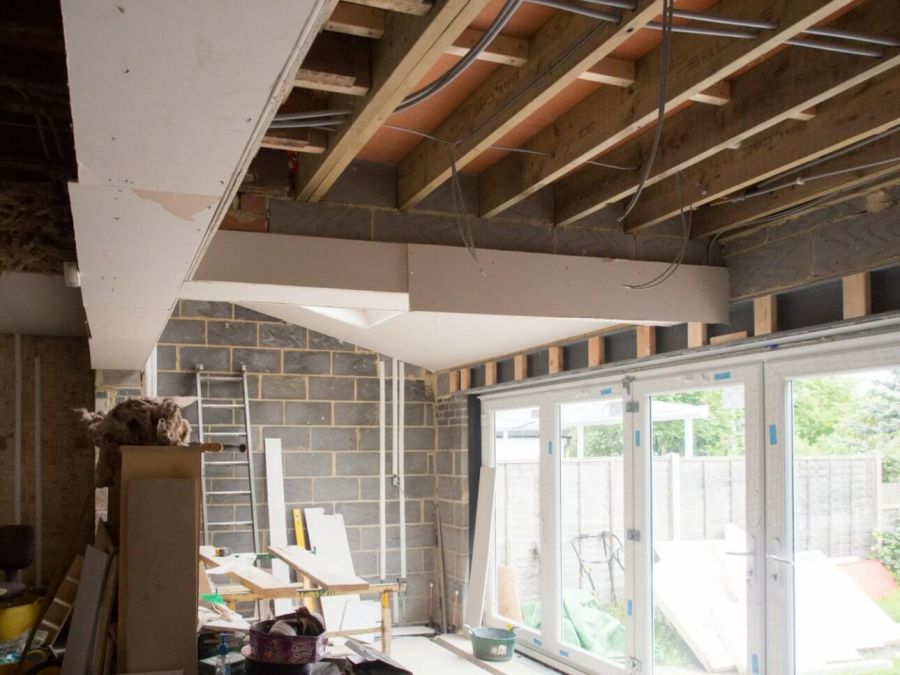
Suspended ceilings are a solution that has become firmly established in modern construction. In flats, offices and commercial premises, plasterboard systems provide a tried-and-tested solution to investors’ needs. Their popularity stems from their ability to effectively conceal services, improve interior acoustics and create attractive designs with varied geometries. Although the end result usually looks light and tidy, the installation process requires precision, proper preparation and knowledge of the system’s solutions. What exactly influences the course of such work, and how long does it actually take to install a suspended plasterboard ceiling? Read on – in this guide, you’ll find specific information to help you realistically estimate the time, costs and scope of the work.
Table of contents
- What does a plasterboard suspended ceiling consist of?
- How do you install a suspended ceiling, step by step?
- The consequences of installation errors
- How long does it take to install suspended ceilings?
- Ceiling area
- Type of structure
- Scope of installation work
- Conditions on the building site
- The cohesion and experience of the construction team
What does a plasterboard suspended ceiling consist of?
A plasterboard suspended ceiling is a structural system based on prefabricated steel components and plasterboard panels, the technical specifications of which are precisely defined by the manufacturers. Such solutions are designed as compatible installation systems – their purpose is to bear dead loads, distribute the weight of the boards evenly, maintain the level of the structure and enable a permanent connection to load-bearing or partition walls. Every component – from the load-bearing profile to the joint tape – fulfils a specific structural and installation function. Only by correctly assembling the components and installing them can the desired result be achieved in accordance with the design or technical requirements.
Basic components of a suspended ceiling system
Plasterboard (GK) – usually 12.5 mm thick; available in the following variants:
- GKB (standard),
- GKBI (waterproof – for bathrooms and kitchens),
- GKF (fire-resistant – for public buildings and boiler rooms).
Steel sections:
- CD – main load-bearing profiles,
- UD – wall-mounted perimeter profiles, used to mark out the level and fix structures to walls.
Brackets for suspended ceilings:
- direct hangers (for low suspension),
- ES hangers or those with a wire and spring (for greater heights),
- suitable plugs and anchors – selected according to the type of ceiling (concrete, timber, expanded clay, etc.).
Fittings and installation accessories:
- cross connectors for joining CD profiles,
- TN self-tapping screws for fixing panels,
- reinforcement tapes and fillers – for creating joints between panels.
Joining a suspended ceiling to a wall:
- precise cutting of the panels whilst maintaining the expansion joint,
- filling the gap with a flexible sealant (e.g. construction-grade acrylic),
- the use of angle brackets or UD wall profiles.
How do you install a suspended ceiling, step by step?
The correct installation of a suspended plasterboard ceiling requires adherence to the correct sequence of works, precision in measurements and the use of components compatible with the installation system. Each stage must be carried out whilst maintaining the correct geometry and level – particularly where the ceiling is to serve as a base for concealed installations, spot lighting or additional finishing layers. In such cases, even minor errors will significantly compromise the structure’s aesthetic appeal. So, what are the stages involved in installing a suspended ceiling?
Stage 1: Designing a suspended ceiling
- Marking out the ceiling level (using a laser or spirit level),
- determining the height of the suspension relative to the ceiling,
- planning the layout of load-bearing profiles and suspension points,
- allowance must be made for installation holes, light fittings and access panels.
Stage 2: Fitting the wall-mounted profiles (UD)
- Secure fixing of UD profiles to load-bearing walls (expansion plugs every 40–50 cm),
- maintaining a consistent level around the entire perimeter of the room,
- preparing reference points for the positioning of hangers.
Stage 3: Fitting the brackets and main profiles (CD)
- Fit the brackets to the suspended ceiling at intervals of 90–100 cm,
- hanging CD profiles on wire hangers or directly,
- checking the alignment and level of the entire load-bearing structure (before final tightening),
- the use of cross-connectors for transverse connections.
Stage 4: Fitting plasterboard
- Cutting the panels to fit the installation grid,
- laying slabs with a lateral offset between them (staggered joints),
- fixing the panels to the profiles using TN screws (approximately every 17–20 cm),
- maintain a gap between the wall and the unit (approx. 5 mm).
Stage 5: Filling and finishing
- Filling gaps and joints with filler,
- embedding the reinforcement strips in the joints,
- levelling of the surface in two layers, if necessary,
- preparing the surface for painting or further work.
The consequences of installation errors
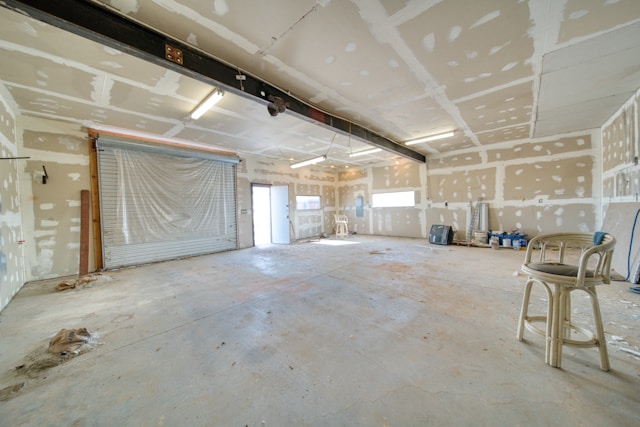
Throughout the entire process, it is crucial to maintain dimensional accuracy and to use materials compatible with the chosen system – it is these factors that determine whether the ceiling will retain its geometry and durability for years to come. Errors made during the construction of the load-bearing structure or the installation of the panels can result in a range of serious technical problems, which, in extreme cases, may require the demolition and complete rebuilding of the entire structure.
- Deformations: These problems most commonly occur when the support profiles have been spaced too far apart or fixed with an insufficient number of brackets. These manifest as sagging of the ceiling surface – particularly noticeable under side lighting (e.g. LED strips or ceiling lights). This can lead to gaps forming between the panels and distortion of the finished surface.
- Cracks: This is the result of insufficient structural reinforcement, poorly executed panel joints, a lack of wall expansion joints, or incorrect grouting. Cracks most commonly appear at panel joints and in corners – as a result of the ceiling’s movement, damp or vibrations. Cracks not only detract from the interior’s appearance, but can also lead to sections of the filler flaking off or the structure being exposed.
- Settlement of structures: this is the most serious consequence of installation errors – it occurs when the hangers have been incorrectly anchored and the ceiling lacks adequate linear support. The structure may then sag by several centimetres, causing the entire surface to deform and posing a safety risk to users. Such situations are particularly dangerous in rooms with a large ceiling span or where the building is subject to heavy use.
That is why it is so important to adhere to the recommended spacing between profiles and brackets, to use components with a verified load-bearing capacity, and to carry out measurements using laser tools. Even minor deviations from level or geometry can ultimately lead to costly repairs.
How long does it take to install suspended ceilings?
The time taken to install a plasterboard suspended ceiling varies and depends on a number of technical and organisational factors. Even for rooms of similar size, there can be significant differences in completion times – it all depends on the complexity of the project and the conditions on site.
Key factors affecting installation time
Ceiling area
The larger the floor area, the more fixing points and panels there are to install; for example:
- A ceiling in a room measuring 20–25 m² can be fitted in 1–2 working days by an experienced team,
- Larger rooms (e.g. living rooms of 40–50 m²) take 2–3 days to complete.
Type of structure
- A simple, single-level design (CD grid on hangers) is the most effective installation option,
- Multi-level ceilings, with arches, recesses or dropped sections, take considerably longer – not only to install, but also to cut and fit the panels precisely.
Scope of installation work
- The presence of light fittings, ventilation openings, detectors and cameras – each of these features requires additional work: cut-outs, passages and structural reinforcements,
- The routing of installation cables requires proper coordination of work between specialists.
Conditions on the building site
- The right temperature and humidity affect the drying time of the joint,
- Incorrect preparation of the ceiling (e.g. uneven surfaces or dirt) may prolong the time taken to fit brackets or profiles.
The cohesion and experience of the construction team
- A trained team with experience in installing drywall systems can reduce completion times by as much as several tens of per cent compared with work carried out using the trial-and-error method.
It is therefore worth bearing in mind that, despite the relatively simple technical process, the installation of a plasterboard suspended ceiling requires careful planning and logistics. Any delay at one stage can lead to delays in subsequent stages – particularly in the case of multi-stage projects.
Costs of installing a suspended ceiling – what do they depend on?
The cost of installing a plasterboard suspended ceiling is made up of several components which – depending on the scope of the work and the solutions adopted – can vary significantly from one project to another. A well-prepared cost estimate should take into account not only the price of materials, but also the specific nature of the labour and any additional installation or finishing elements. The final quote is primarily influenced by:
- the type of materials used,
- the complexity of the design,
- labour costs,
- additional installation work,
- materials logistics and procurement.
Installing a suspended ceiling made of plasterboard is a process that requires meticulous preparation, knowledge of drywall techniques and the ability to work with system components. Although the installation process itself appears straightforward, every stage – from levelling, through the positioning of the profiles, to the final jointing – requires precision and adherence to technical guidelines. Even minor errors can result in warping, cracks or the need for costly rectifications. The correct selection of materials, suited to the specific characteristics of the room and the project requirements, is the foundation of a well-executed ceiling.


