






Blog
Cement-lime plaster – properties, uses and prices [Guide]

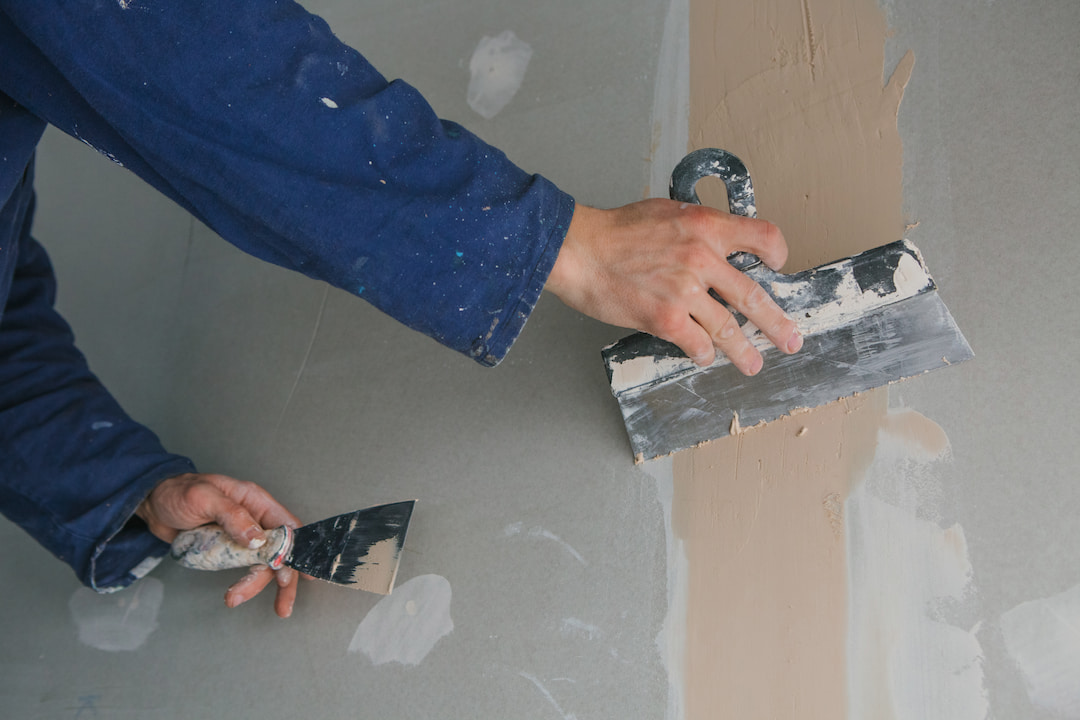
Cement-lime plaster is one of the most popular types of plaster in Poland – and for good reason. It combines the strength of cement with the workability of lime, making it ideal for both interior walls and external facades. In this guide, you’ll find out how it differs from gypsum plaster, where to use it, how to apply it and how much it actually costs.
Key findings
- Cement-lime plaster combines high resistance to moisture with good vapour permeability, which is why it is suitable for use both indoors and on façades.
- It is particularly recommended for bathrooms, kitchens, garages, cellars and other rooms exposed to high levels of humidity.
- Compared with gypsum plaster, it is more durable and more water-resistant, although it takes longer to dry and usually requires further smoothing.
- Proper substrate preparation, correct priming and adherence to the recommendations regarding temperature and drying time are crucial for the durability of the plaster.
- The total cost of applying cement-lime plaster, including labour, is usually between 38 and 80 zł/m², depending on the thickness of the layer, the type of substrate and the region.
Table of contents
What is cement-lime plaster and when should it be used?
Cement-lime plaster is a dry mixture of three components: Portland cement as a hydraulic binder, slaked lime as an air-setting binder, and quartz sand as a filler. Cement provides hardness and resistance to moisture, whilst lime provides workability and ease of application. Together, they form a material that is ideal for use where gypsum plaster is unsuitable: in bathrooms, kitchens, garages and on façades.
Composition and properties of cement-lime plaster
Ready-mixed compounds, such as Knauf MP 75, have certified performance characteristics in accordance with the PN-EN 998-1 standard. What does this mean in practice?
- Compressive strength – Subclasses M5, M10 and M15 are available. The higher the number, the harder the plaster once set. For typical internal walls, M5 or M10 is sufficient.
- Vapour permeability – Cement-lime plaster „breathes”. Water vapour can pass freely through the partition, which prevents condensation in the wall and the associated mould growth.
- Grip – suitable for concrete, ceramic bricks, silicate blocks and aerated concrete blocks (e.g. YTONG). Does not require any special primers on standard substrates.
- Resistance to damp and frost – a key advantage for façades and wet rooms. When applied correctly, water does not damage the structure of the plaster.
- Setting time – approximately 3–7 days to achieve working strength; full curing takes up to 28 days. Do not paint or lay tiles too soon.
Where to use cement-lime plaster – internal walls vs façades
Cement-lime plaster is a versatile material – one of the few that works well both indoors and outdoors.
Indoor applications: kitchens, bathrooms, garages, cellars, utility rooms, boiler rooms. Anywhere where humidity levels tend to be high or fluctuate.
Outdoor applications: the façades of detached houses as a base coat (for thin-layer textured renders), retaining walls, and the building’s plinth.
Surfaces on which it can be used: ceramic bricks, aerated concrete blocks, silicate, concrete, old cement plaster after cleaning.
Where NOT to use: directly onto plasterboard (plaster is better here) or onto polystyrene without the appropriate adhesive and reinforcing mesh. Choosing the right primer is half the battle – check out our article on this, how to choose the right primer for the type of surface.
Cement-lime plaster and damp – why does it work well in bathrooms?
Key mechanism: the lime in the mixture raises the surface pH, which inhibits the growth of mould and fungi right at the plaster level. Added to this is its low water absorption – water does not penetrate the structure as quickly as it does with gypsum.
Important note: in areas in direct contact with water – such as shower trays and shower cubicles – cement-lime plaster acts as a base coat, not as a waterproof barrier. A waterproofing layer must still be applied before the tiles are laid. However, as a base layer for ceramic tiles in wet rooms, it is a safe and tried-and-tested choice.
Cement-lime plaster vs gypsum plaster vs cement plaster – a comparison
Choosing the right plaster is one of those decisions that has long-term consequences. A mistake in a dry living room is a minor issue. A mistake in the bathroom, however, can lead to mould on the walls after just two winters. That’s why it’s worth understanding the differences before you mix your first batch.
Comparison table – features, price, uses
| Feature | Cement-lime plaster | Gypsum plaster | Cement plaster |
| Ingredients | Cement + lime + sand | Plaster + additives | Cement + sand |
| Application | Interiors and façades | Dry interiors only | Wet interiors, façades |
| Moisture resistance | High | Low | Very high |
| Ease of machining | All right | Very good | Average |
| Drying time | 3–7 working days, 28 days in total | 24–72 hours | 7–14 days |
| The need for filling | Yes (for a smooth finish) | Often not | Yes |
| Price per 30 kg bag (approx.) | 25–40 zł | 30–55 zł | 20–35 zł |
| Consumption (1 cm thick) | 12–14 kg/m² | 8–10 kg/m² | 14–17 kg/m² |
| A typical Knauf product | Knauf MP 75 | Knauf Rotband | — |
When should you choose gypsum plaster rather than cement-lime plaster?
Gypsum plaster is the ideal choice wherever speed and a smooth finish are important. Dry rooms (living room, bedroom, hallway), finishing work with tight deadlines, and plasterboard substrates – these are its natural environments.
Three situations where gypsum plaster isn’t suitable: the bathroom, the garage and the external wall. Here, you’ll need a cement-lime or cement-based plaster. If you’re looking for a good gypsum plaster for dry rooms, take a look at Knauf Rotband — gypsum plaster, and if you’re unsure which application method to choose, read our article on machine-applied and hand-applied gypsum plasters.
Cement plaster versus cement-lime plaster – how do they differ?
Cement-based plaster (without lime) is harder and more waterproof, but more difficult to work with – it is less malleable, takes longer to level out uneven surfaces and cracks more quickly if the water content is incorrect. It is used where maximum strength is required: industrial floors, foundation walls and areas of extremely high humidity.
Cement-lime plaster: lime improves the workability of the mixture, making it easier to finish and ensuring better adhesion to brick and aerated concrete walls. For a standard bathroom and kitchen in a detached house – a better, more practical option than pure cement.
Knauf cement-lime plasters – product overview
Knauf is a brand with which PK Complex works directly as an official partner — which means consistent product availability, certified specifications and guaranteed authenticity. Here is what you will find in our range:
Knauf MP 75 – lightweight machine-applied plaster
The flagship product in the range of cement-lime plasters. A lightweight mix designed for machine application – a plastering machine mixes and applies the material directly to the wall, reducing working time by 30–50% compared with manual application.
- Strength class: M5 (suitable for internal walls and standard façades).
- Coverage: approx. 13 kg/m² at a thickness of 1 cm.
- Application: machine-applied plastering of internal walls and ceilings; primer for thin-coat plasters on façades.
- Substrates: concrete, ceramic brick, silicate, aerated concrete.
If you’re planning a major plastering job or renovating your house from the ground up – Knauf MP 75 plaster It’s the logical choice. You can negotiate prices directly with us, and for larger orders we’ll always advise you on the optimal number of bags.
Other products from the Knauf range of cement-lime plasters
PK Complex’s range includes a full spectrum of complementary products – for a variety of substrates and requirements:
- Knauf Tiefengrund – a deep-penetrating, strengthening primer, ideal for use before plastering absorbent or crumbling substrates. It prevents the plaster from drawing water away from the substrate too quickly, which improves adhesion and reduces the risk of cracking. Find out more: Knauf Tiefengrund.
- Knauf Betokontakt – an adhesive bridge for difficult substrates: smooth concrete, old tiles, prefabricated elements. The pink colour allows you to check the coverage. Essential when you want to ensure adhesion in places where it would not normally be possible. Check it out: Knauf Betokontakt.
How do you choose the right Knauf plaster for the type of wall and substrate?
A simple rule: choose the type of plaster to suit the environment and the substrate – not based on aesthetic preferences.
- A wall in a dry room (living room, bedroom): gypsum plaster (Rotband) – quicker, less dust, a smoother finish.
- Kitchen, bathroom, garage, cellar: cement-lime plaster (MP 75) – moisture resistance is a priority.
- Standard façade: MP 75 as a primer + a thin layer of decorative plaster on top.
- Smooth concrete or old tiles: You must apply Betokontakt before plastering, so that the plaster has something to grip onto.
- Absorbent, dusty substrate: Tiefengrund as a primer – the plaster will not adhere to a brittle substrate.
How to apply cement-lime plaster? Step by step
Surface preparation – priming and cleaning
Plaster will not adhere to a dirty, greasy or crumbling wall. Before you start:
- Clean the wall to remove loose bits, dust, grease and old, flaking paint.
- Check the absorbency: dampen the wall with water. If the water is absorbed within a few seconds, the surface is highly absorbent and requires a primer. Use Knauf Tiefengrund, mix it with water in a ratio of 1:3 and apply with a roller or brush.
- Difficult surfaces (smooth concrete, old ceramic tiles)? Instead of Tiefengrund, use Betokontakt – apply with a brush and leave to dry (the pink layer must set, approx. 2–4 hours).
- Position the plastering guides (battens) vertically, checking that they are flush with the wall. This is essential for achieving an even plaster finish without any unevenness.
Machine application vs manual application – which should you choose?
Both methods produce good results, but differ in terms of context and cost:
| Method | Pros | Cons | When should you choose? |
| Machine-operated (unit) | 3–4 times faster, more even application, less physical effort | The cost of hiring a generator, the need to clean the machine | Large areas (>50 m²), refurbishment of entire houses |
| Manual (trowel) | No equipment required, full control over thickness | Slower, requires practice, more effort | Small rooms, touch-ups, amateurs |
Common mistakes when applying cement-lime plaster and how to avoid them
- Not enough water, or too much. The ratio of water to powder must comply with the product data sheet. If the plaster is too dry, it will not spread smoothly and will crack. If it is too wet, it will run and lose its strength.
- Plastering in direct sunlight or in strong winds. Plaster that dries too quickly will crack on the surface. Shade the wall or carry out the work in the morning or evening.
- No priming of absorbent substrates. The substrate draws water from the plaster before it has had time to set. The result: dry, brittle, flaking plaster.
- The layer is too thin. The minimum thickness of a single layer of cement-lime mortar is 6–8 mm. A thinner application will not provide sufficient strength.
- Painting before it has dried completely. Cement-lime plaster requires at least 28 days to cure fully. Paint applied before this time may flake off as moisture escapes from the wall.
How much does cement-lime plaster cost? Prices and calculator
Price of cement-lime plaster per bag and per m²
The approximate market prices for cement-lime plaster in 30 kg bags are 25–40 zł per bag. Prices at PK Complex are negotiable – particularly for bulk orders and comprehensive supplies for an entire building. Please call or email us before placing your order.
Calculated per square metre with a layer thickness of 1.5 cm: consumption of approx. 18–21 kg/m², which is roughly 15–28 zł/m² for the material alone.
Consumption calculator – how many bags do you need?
A simple formula:
- Measure the total surface area of the walls to be plastered (m²).
- Decide on the thickness of the layer (1.5 cm as standard for a single application).
- Calculate: area [m²] × thickness [cm] × 13 kg/m²/cm = total weight of the plaster [kg].
- Divide by 30 (bag capacity) and add 10% for waste.
Example: Bathroom 12 m², walls ~28 m² (4 walls), thickness 1.5 cm → 28 × 1.5 × 13 = 546 kg ÷ 30 = 18.2 bags + 10% = approx. 20 bags.
Not sure about the calculations? Drop us a line or give us a call – we’ll work it out together so you don’t end up buying too little or too much.
Total cost of plastering – materials + labour
| Component | Approximate cost | Comments |
| Material (plaster) | 15–28 zł/m² (for 1.5 cm) | Depending on the product and thickness |
| Primer (Tiefengrund/Betokontakt) | 3–7 zł/m² | Not always required |
| Labour — the team | 20–45 zł/m² | Machine-made is cheaper than hand-made |
| Total (estimate) | 38–80 zł/m² | It depends on the region and the size of the property |
When renovating an entire house, the difference between the cheapest and the most expensive material options is often several hundred zlotys – but the difference in durability and ease of use can be significant. If you’re faced with a choice of several products and aren’t sure which to choose – give us a call, and we’ll help you select the best option to suit your budget.
FAQ – frequently asked questions about cement-lime plaster
Can cement-lime plaster be applied to polystyrene?
Not directly. Expanded polystyrene is smooth and water-repellent – standard cement-lime plaster will not adhere to it without proper preparation. On ETICS insulation systems (polystyrene + mesh + adhesive), thin-coat plaster is applied to the finished base coat; cement-lime plaster is not applied directly to the polystyrene. If you have any doubts about the layer sequence – ask before you buy.
How long does cement-lime plaster take to dry?
Working strength (ability to carry out further work, e.g. tiling) – 3–7 days under normal conditions (15–25°C, moderate humidity). Full chemical curing: 28 days. If the surface dries out too quickly due to wind or sun, this may cause cracking – in which case, lightly moisten the wall with water for the first 2–3 days.
Can cement-lime plaster be painted straight away?
No. You must wait at least 28 days after application. As it cures, cement-lime plaster releases moisture and alkaline calcium compounds. Paint applied too soon may blister, flake or change colour. After 28 days, you can prime and paint using standard paints for mineral plasters.
What temperature is required when applying cement-lime plaster?
Minimum substrate and ambient temperature during application and curing: +5°C. Maximum: +30°C. Below +5°C, the cement does not set properly – the material loses its strength or fails to set at all. Above +30°C, the plaster dries too quickly and cracks. When working in summer in direct sunlight, protect fresh plaster from direct sunlight.
Does Knauf cement-lime plaster require skimming?
Yes, if you’re planning to paint a smooth finish. Cement-lime plaster gives the plaster a textured finish – visible grain and a slight roughness. A layer of finishing plaster is necessary for a smooth paint finish. For ceramic tiles, plastering is not required – what matters here is the evenness of the substrate, not its smoothness. Knauf MP 75 applied directly beneath ceramic tiles is the right choice without any additional layers.
Summary
Cement-lime plaster is a material that should feature in any renovation budget where there is a bathroom, kitchen, garage or façade. You can’t use it as a substitute for gypsum in a dry living room – but wherever damp is present, it’s the only sensible choice.
A specific recommendation to get you started: Knauf MP 75 for machine-applied interior plastering + Tiefengrund for absorbent substrates or Betokontakt for difficult ones. This set covers 90% of typical renovation jobs without any unnecessary questions.


